The KICKR BIKE comes packaged in a single large box, and some assembly is required. The 4mm and 5mm Allen wrenches for assembly of the legs and handlebars is included . It is recommended that assembly be done with 2 individuals.
Assembly
- Remove and lay out all items from the accessory box to ensure all items are included.
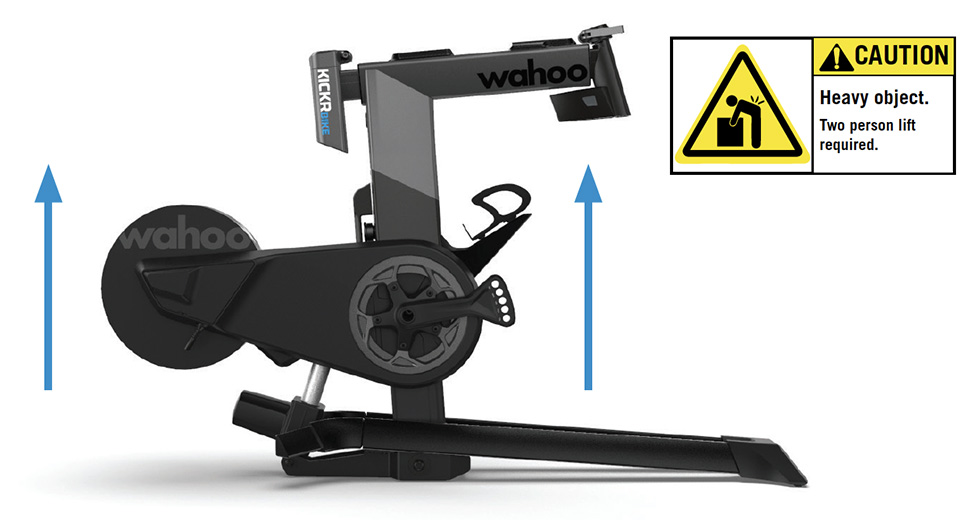
Next, team lift KICKR BIKE with a partner to remove it from the box.
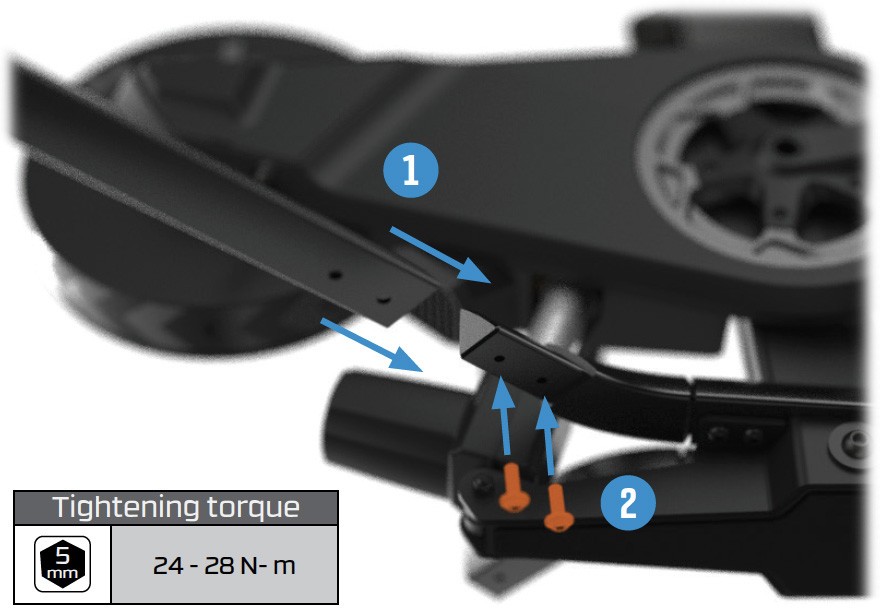
Have one person tilt the frame of the main assembly to one side for easy access, then attach the first stabilizer leg to the lower frame using the supplied 5mm hex bolts and Allen Key. Repeat the process for the other side.
Attach the handlebar assembly to the KICKR BIKE using the quick release.
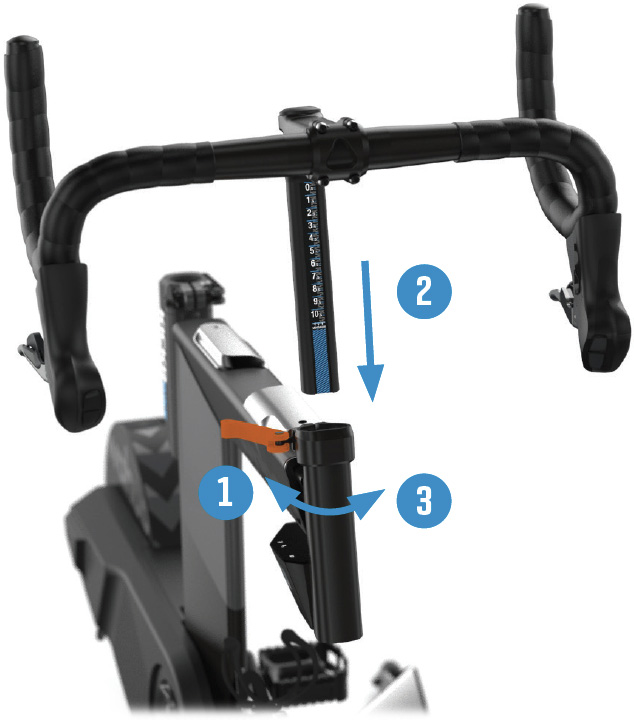
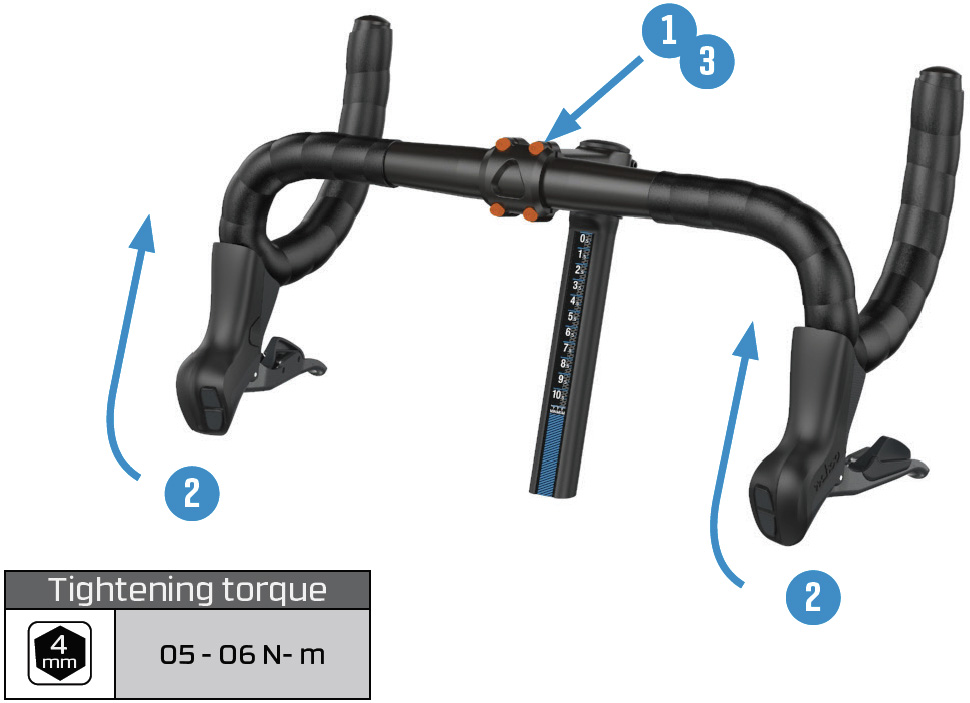
The handlebars come installed in a tipped down position for shipping. Use the 4mm Allen wrench to loosen (but not remove) the stem bolts on the face plate. Rotate the handlebars to your desired position, then tighten the bolts evenly.
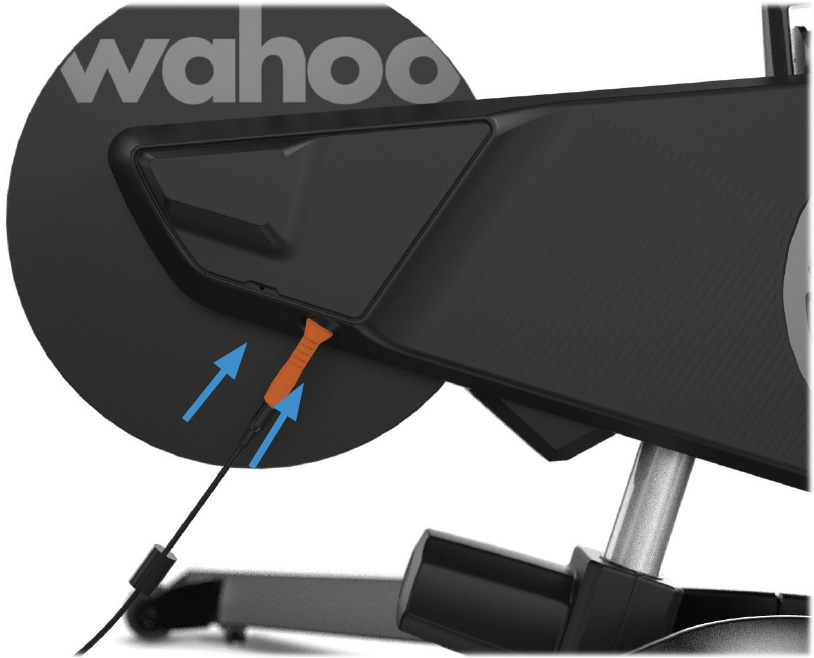
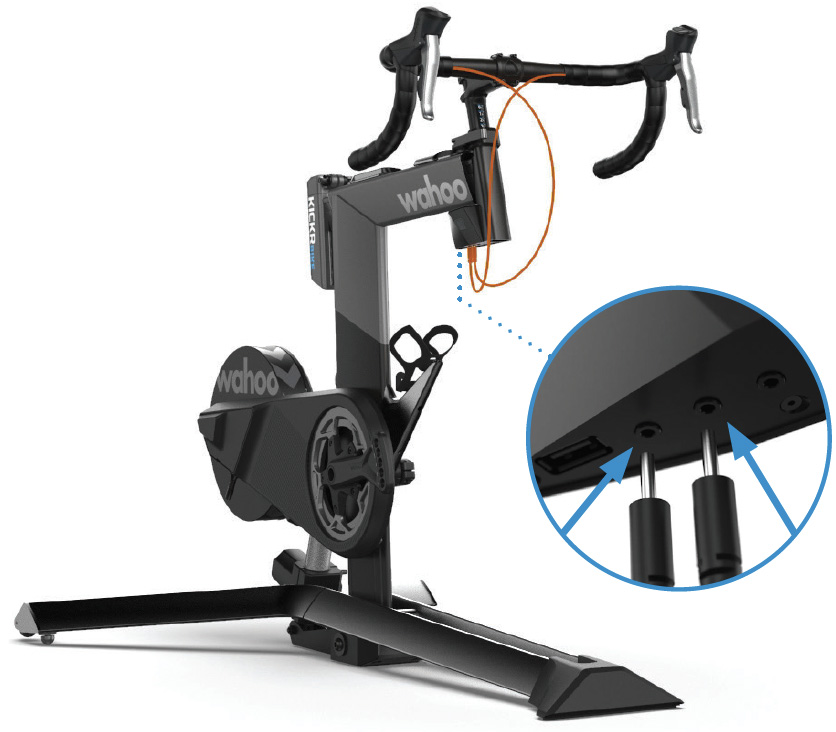
Plug both of the shifter cords into the bottom of the LED display screen. Shifter cords may be connected to any of the 3 available ports. The LED display also features a USB port for convenient device charging, if desired.
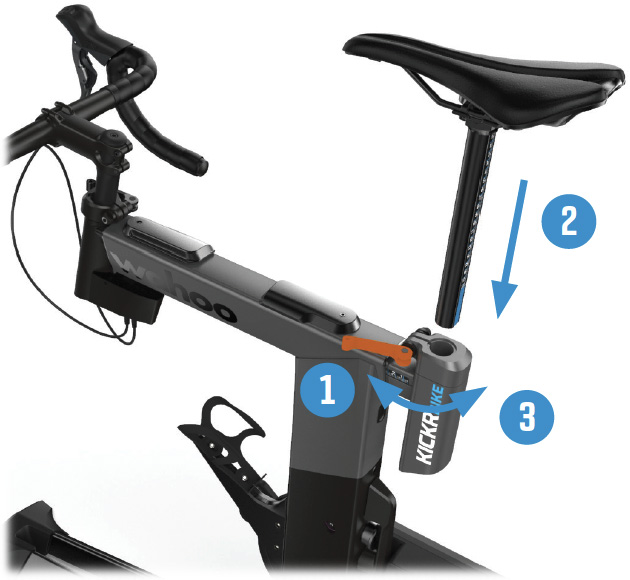
Insert the seat post assembly into the KICKR BIKE by loosening, then tightening the rear extension quick release.
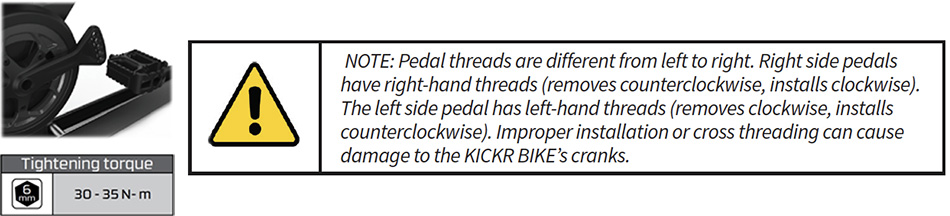
Attach pedals to the crank arms. Some pedal axles may require the use of washers (included) for necessary clearances to KICKR BIKE housings. KICKR BIKE is designed to accommodate 165mm, 167.5mm, 170mm, 172.5mm and 175mm crank lengths by simply installing the pedals to the corresponding hole on the crank arm. Be sure to identify the left and right pedals and grease the threads on both. Thread the right pedal into the drive side crank using the washer for correct spacing (if needed). Wrench until snug. Repeat on the non drive side.
- Use the included AC power adapter to connect the KICKR BIKE to a standard wall outlet.